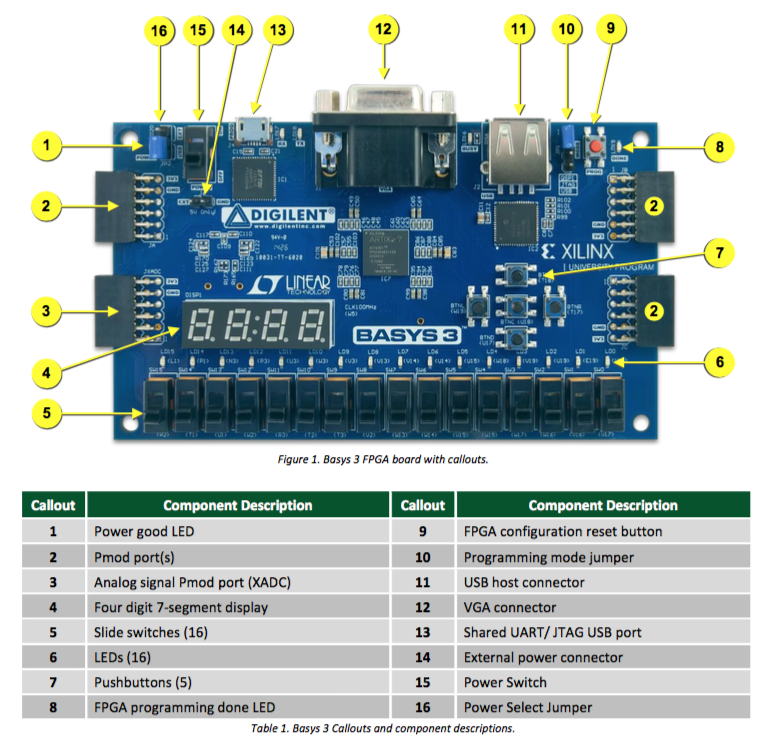
As discussed in previous projects, you can send the program into the onboard flash ram, so that the board will power up and load the program automatically. To accomplish this, first move the jumper on J1 to the QSPI position (see Basys3 photo above, J1 is item 10, the jumper should connect the first 2 pins closest to the edge). The file that is sent to the flash over the USB cable is a .bin file, and has to be created when you "Generate Bitstream". To ensure this, right click on "Generate Bitstream" and select "Bitstream Settings". That will produce a popup window that looks like this:
Click on "Bitstream" in the left panel "Project Settings", select "-bin_file*", and hit OK. Then generate the bitstream. It should make the *.bin file, in the same place (*_runs/impl_1/*.bin) as the *.bit file.
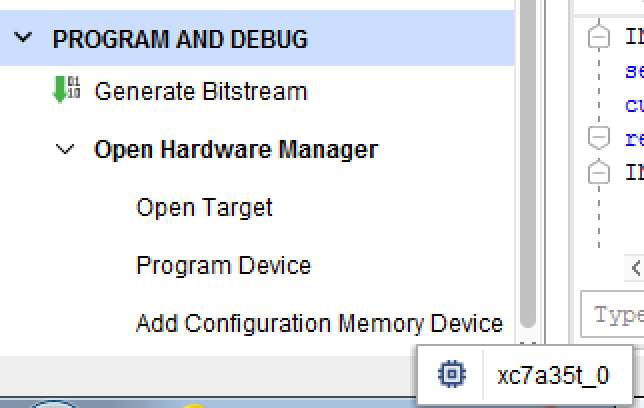
Now you have to tell Vivado about the flash memory, so it can download to it. The easiest way to do this is to click on "Add Configuration Memory Device" in the hardware manager and select the device "xc7a35t_0"
This will bring up a new window called "Add Configuration Memory Device":
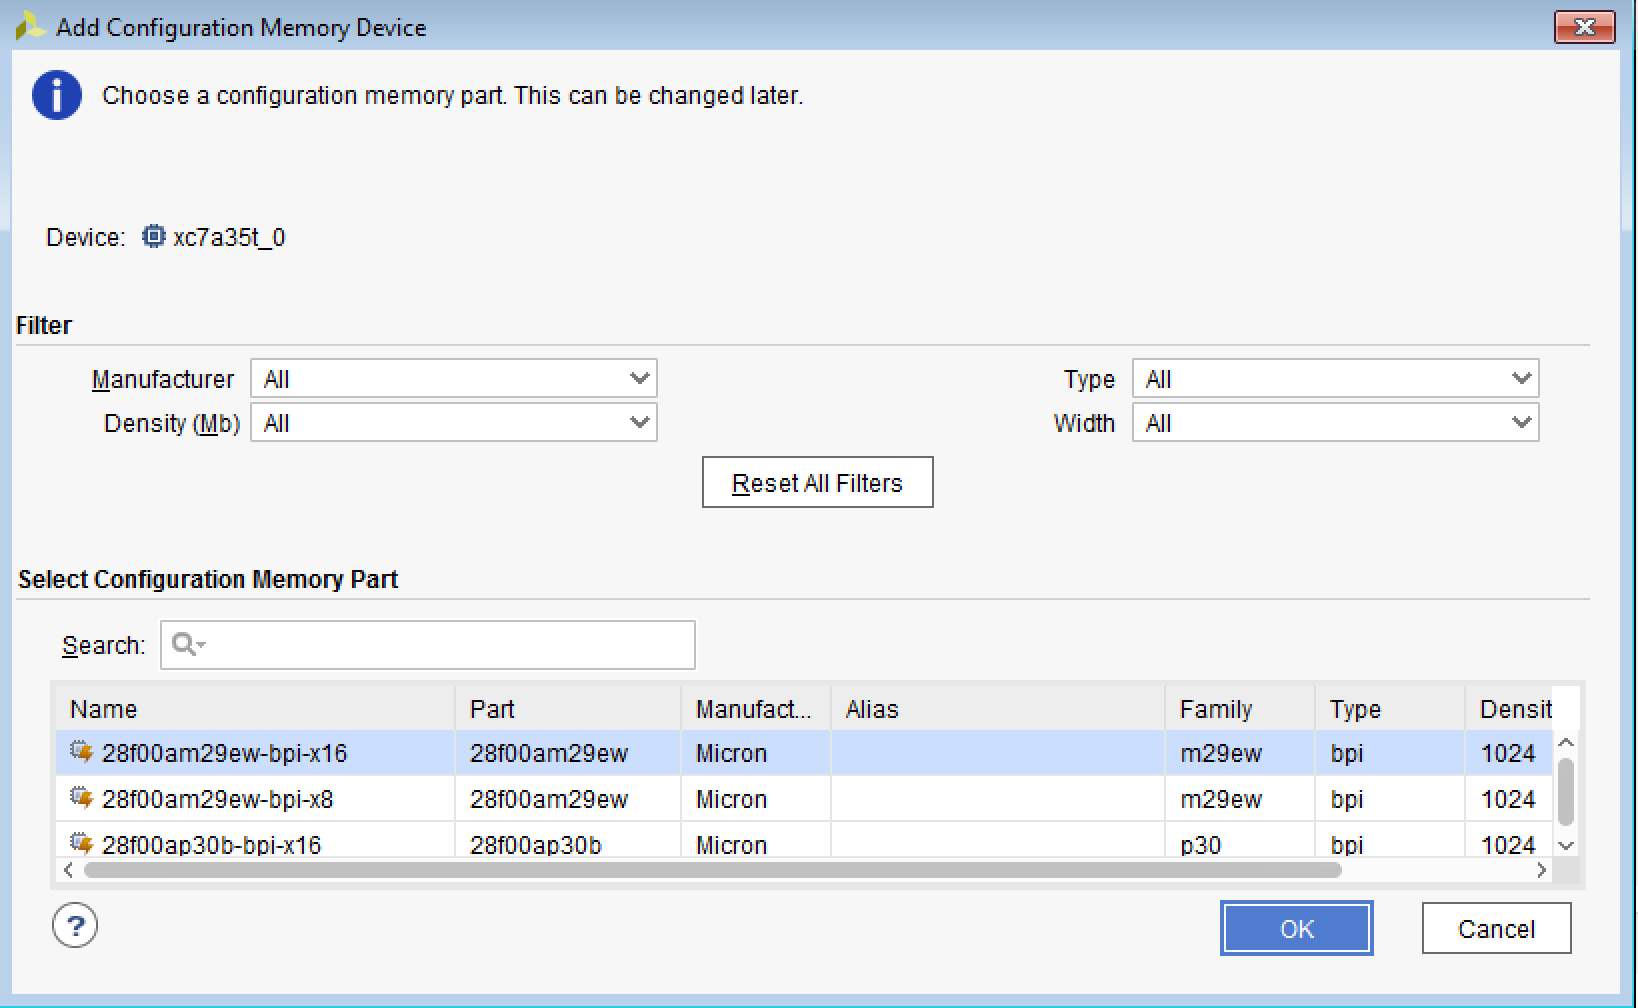
In the "Search:" text area, type in the flash device name, which is found on page 6 of the basys3_rm.pdf file: S25FL032. That should bring up the correct name in the list below the search field. Click on that name and hit OK. If all is well, you should see something like this in the "Hardware" panel:
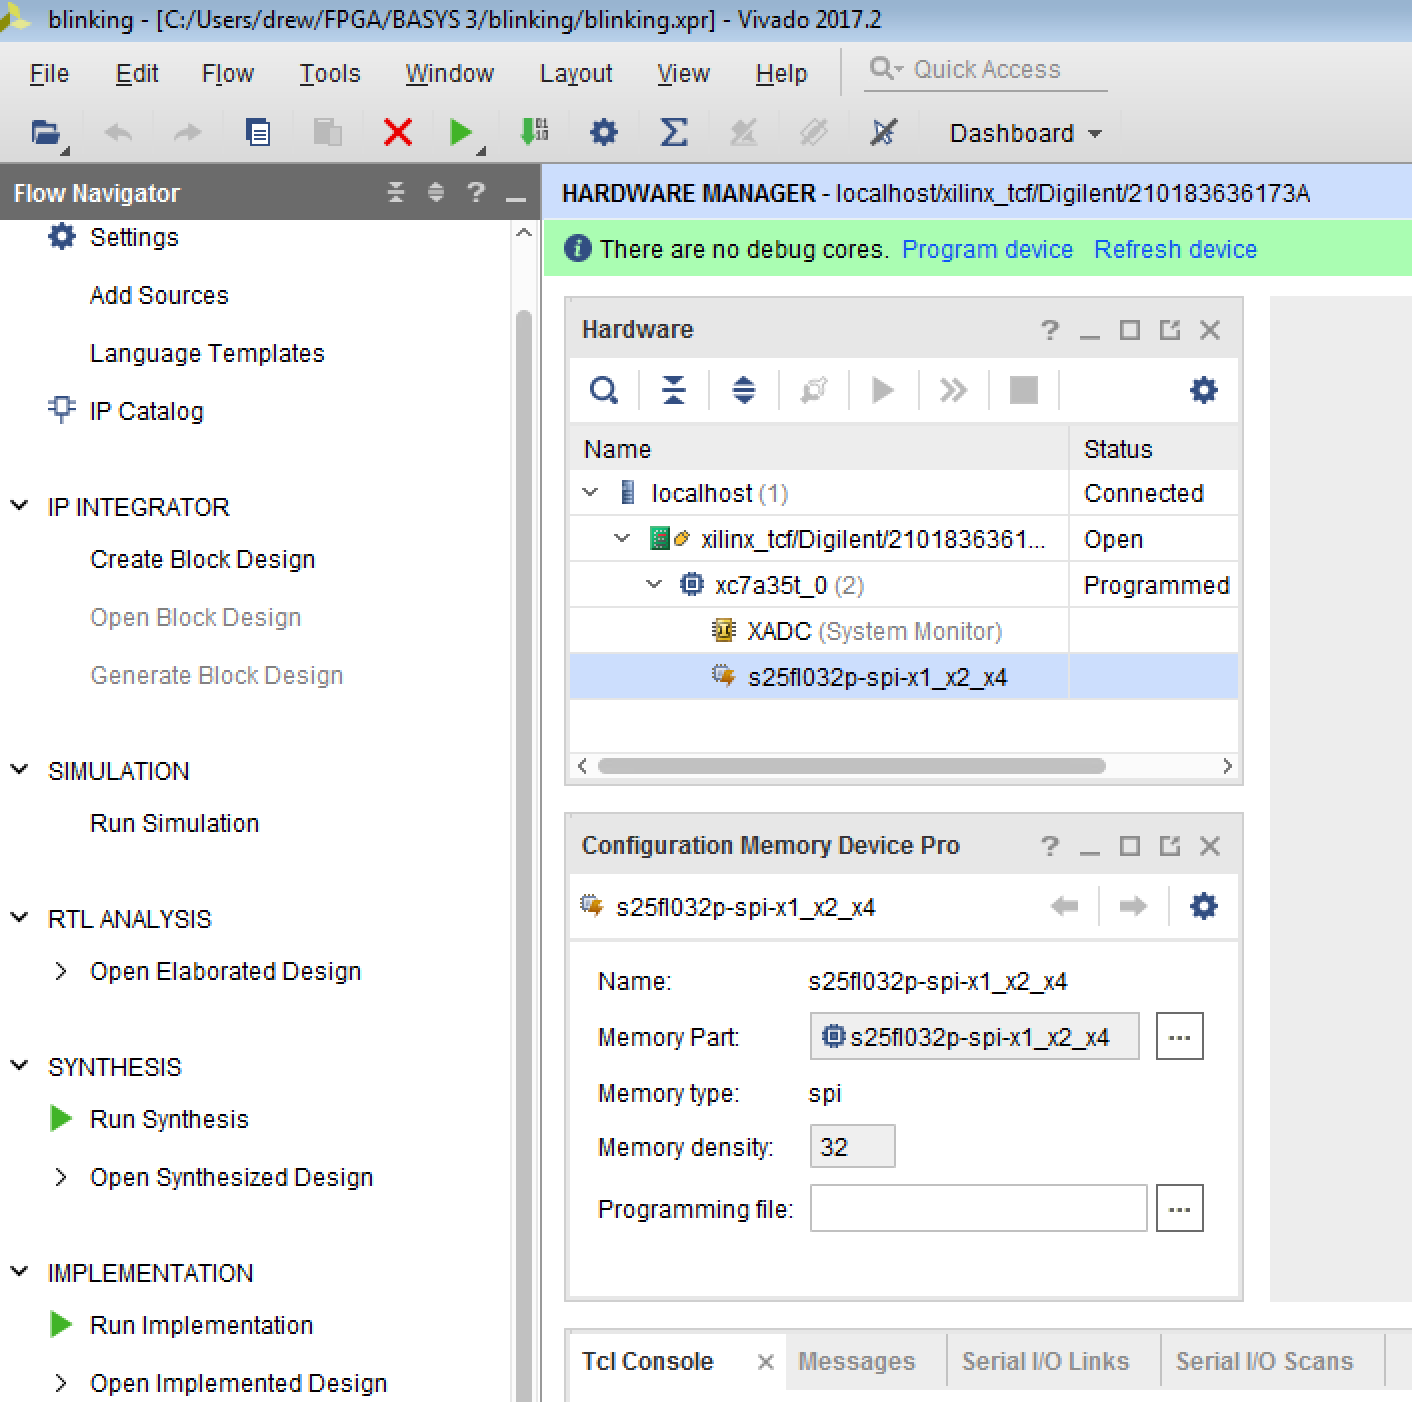
Then all you have to do is right click on the memory part (s25fl032p-spi-x1_x2_x4) and select "Program Configuration Memory Device". It will pop up yet another window asking for the .bin file. Navigate to it in the "Configuration file:" text window (again, it's in the directory *.runs/impl_1 where * is the project name), select the .bin file, and hit OK, and hit OK again in the "Program Configuration Memory Device" window. It will then show a progress window where it first erases, and then programs the flash. It will take probably 30 seconds or so, and if all goes well will show a window that says "Flash programming completed successfully". Hit ok.
The last thing you need to do now is to actually load the program from flash into the FPGA by pushing the "PROG" button (item 9 in the photo below). It takes about 5 seconds.